I’ll admit, I was a little slow to jump on the Interactive Notebook craze. I didn’t really get what it was all about at first. Once I figured out how awesome they were, I thought, sign me up! I purchased some Interactive Reading Notebooks for my class and we got right to work!
Um. Epic Fail.
My students were ALL over the place. Literally. Throughout the lesson, I had students constantly searching the room for supplies or making multiple trips to the recycling bin. Students were jumping ahead and not following the correct directions. After a week, I threw my hands up in frustration.
But, like any good teacher, I took a step back and thought about how I could make this work in my classroom. I knew that my students could really benefit from these activities, as long as we could get ourselves organized.
Material Organization
I decided that each group needed their own set of materials. This would ensure that all students had everything they needed at the beginning of the lesson and eliminate the constant searching for scissors, red crayons, etc. I numbered my groups and each group has their own bucket.
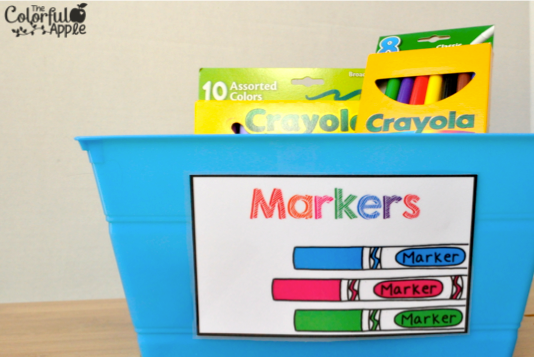
The buckets are kept all together on a shelf in the classroom. At the beginning of the lesson, one student from each group retrieves the bucket and empties it once they get back to their group (I’ll explain why in a minute). I also keep buckets of extras on hand, in case a group runs out of something. I label these buckets by the type of material they contain.
Once the bucket is emptied, it becomes a mini-recycling bin! With Interactive Notebooks, there are a lot of scraps. I either had students constantly walking to the recycling bin or pieces of paper all over the floor. Their group bin collects all their scraps until the very end of the lesson. This way, if something is thrown away “accidentally,” it can be easily retrieved! Once the lesson is over, one student from each group empties their bucket before putting their materials back in.
And those extra pieces that don’t need to be recycled? They go in the envelope in the back of their notebook! Sometimes we don’t finish our lesson before class ends, so this envelope holds the pieces that have been cut out, but not glued down yet.
Giving Directions
I was also struggling with students who were jumping ahead of me before I completed my directions or having to repeat myself if students didn’t hear the directions. I decided picture clues were the answer!
I made number cards and visuals for each step. They are very basic, so they could be used with any notebook we were creating. I glued magnets to the back so that they could be hung up on my white board.
Our class also came up with a new rule. They couldn’t start a step until the picture clue had been put on the board. For example, they weren’t allowed to even pick up their scissors until the “Cut” picture was placed on the board by me. This meant that they would hear all the directions before they started. Their eyes were all on me, as well, as they waited until I put that picture up!

`
Taking these steps towards organization has made a HUGE difference in my teaching with Interactive Notebooks. It is no longer a frustration for me or a mess for my students. And we really enjoy learning this way! If you are interested in any of these labels, you can grab them
here. I hope that you find them helpful as well!


 `
`